Creating Villager Model
In this guide we’ll be covering the steps for editing a Villager model. This can be later used to add a new villager to the game.
Prerequisites
Section titled “Prerequisites”- A dump of your game files
- Switch Toolbox
- Blender (for model editing)
- A program to edit textures (e.g.
GIMP,Photoshop, etc) - Heaven Tool
- MSBT Editor
Exporting Model
Section titled “Exporting Model”-
In your dumped
romfs, locate theModelfolder and a reference Vilager Model of your choice (they start withNpcNml);There is a list with all Villager identifiers
-
Copy and move the Vilager of your choice into a new folder, just to backup and have a easy way of finding it again.
-
Load the Villager into Switch Toolbox, it will be loaded as folder.
-
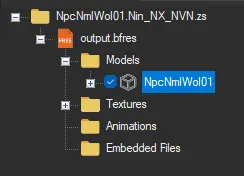
Expand it by clicking on the small
+button next to the folder name, do the same foroutput.bfresandModels.It should look like this:
-
Right-click the Model inside
Modelsand export it as a.daeto a folder of your choice.
Editing with Blender
Section titled “Editing with Blender”-
Open your Blender and import your model (
File>Import>Collada (.dae) (Legacy))Blender may remove
.daesupport in the future (Blender 5.0), at the time of writing Blender 4.5.0 still have this option, as do older versions. -
You can now do almost whatever you want to the Model. But it is important to keep in mind:
- Keep everything low poly, specially if you’re making a entire new model.
- When creating accessories or something to extend the Villager, make sure to keep it joined to some part of the body (
Ctrl + J). - Keep the name of body parts intact. For example:
Body__mBody. - New parts you create need to be weight painted.
- Keep one material per body part.
-
When you’re done with Blender editing, export it as
.daeagain.
Texture Editing
Section titled “Texture Editing”-
In Switch Toolbox, right-click the
Texturesfolder insideoutput.bfresand hitExport All Textures.Make sure to select a empty folder for your textures.
-
You can edit textures with any program of your choice. E.g. Photoshop, GIMP or even Substance Painter if you’re looking into complex edits.
-
If you end up with bright textures in-game, try lowering the opacity of your
Albtextures (something around 32%). -
In Switch Toolbox, right-click the
Texturesfolder and hitReplace Textures (From Folder).Select the folder you exported before, but make sure it only contain the exported textures and nothing more.
Normal Map Tips
Section titled “Normal Map Tips”…
Importing Model
Section titled “Importing Model”…
This guide was originally written by @CutieSammy, the original version is available on GameBanana.